RV CAMPERS HITCH INSTALLATIONS
Call now for a quote or consultation
352-572-1090
CALL ANYTIME FOR A FREE QUOTE
352-572-1090
Robby Billings
If you would like to ask questions, set up an appointment, or would like to leave feedback please send us an email now.
BONUS BELOW
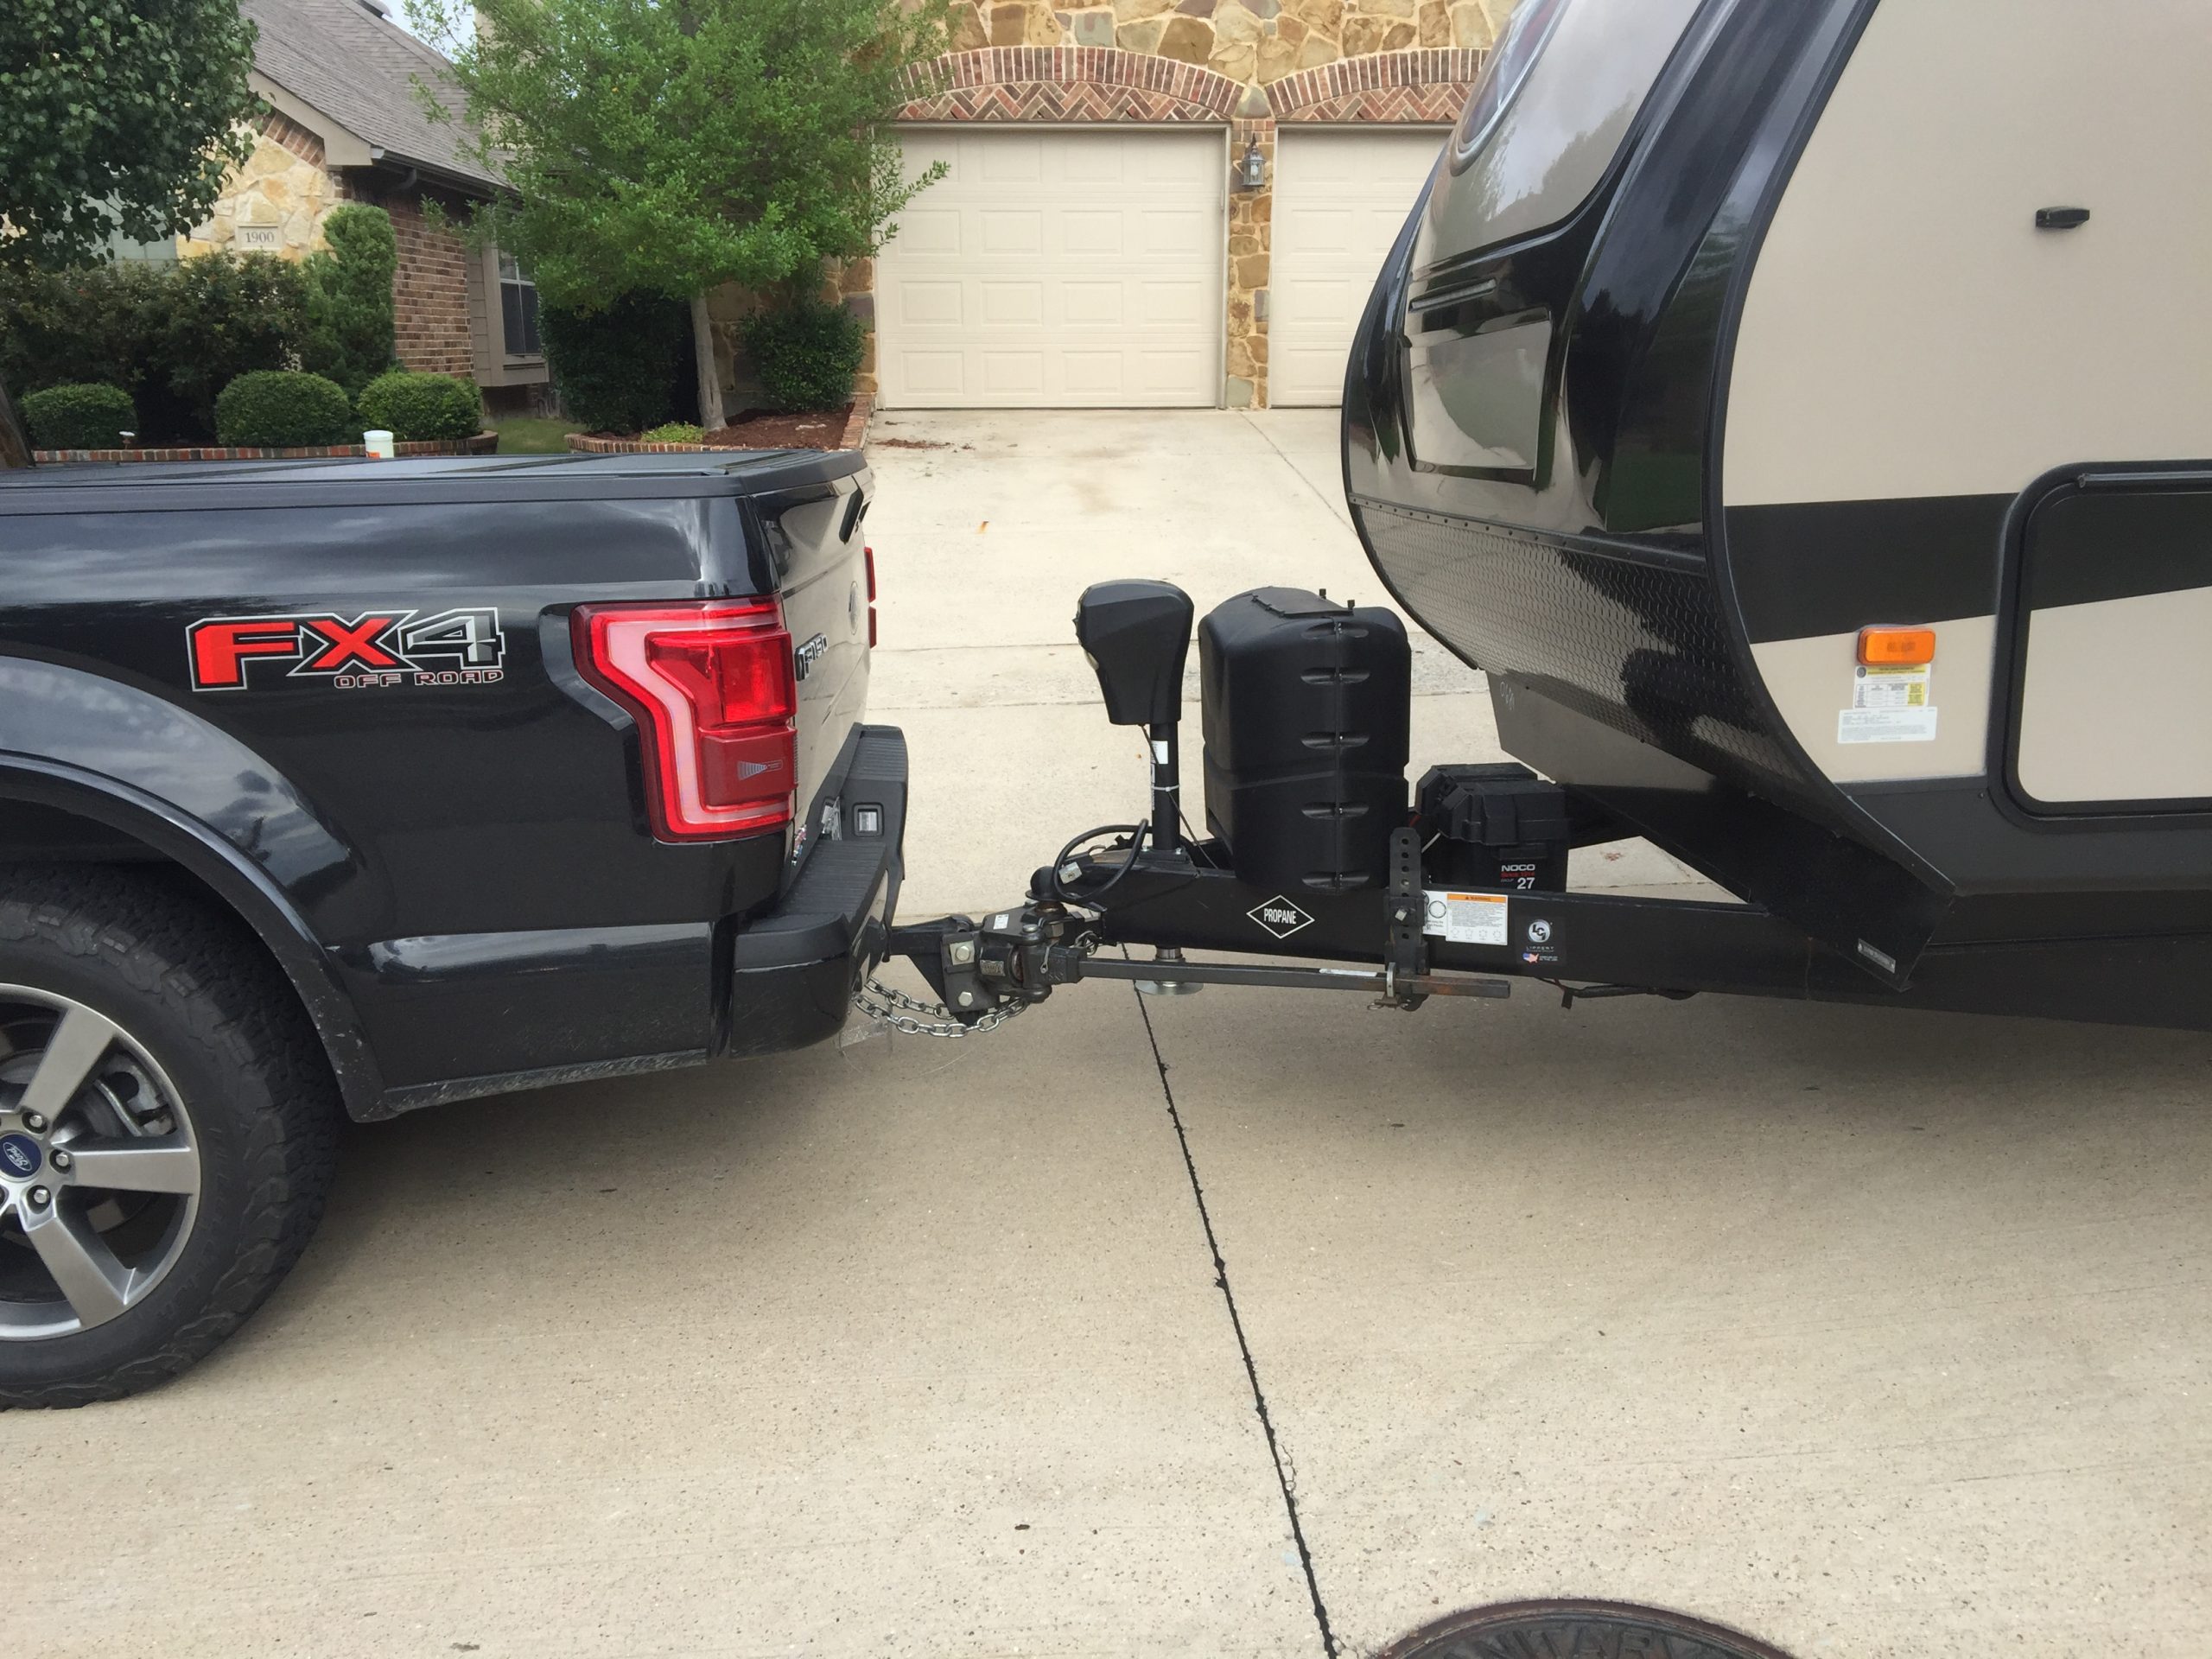
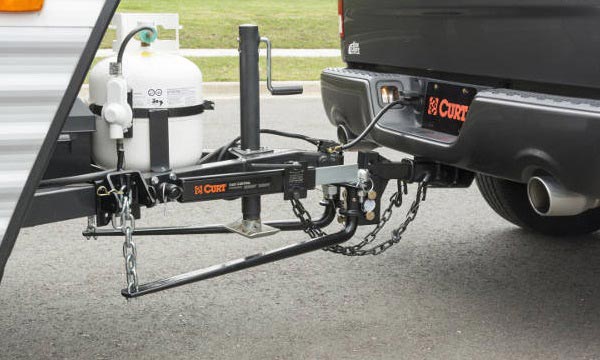
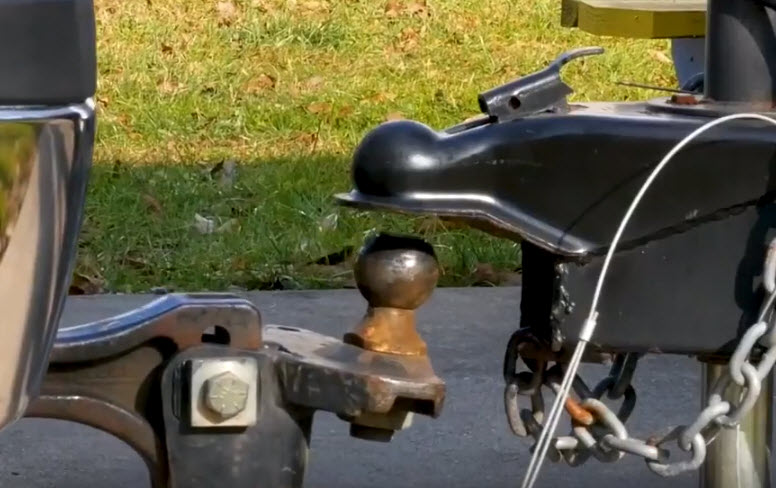
In this article, we will guide you on how to to the RV Trailer Hitch Installations Step by Step. Preliminary steps to install a trailer hitch are to reconnect the battery which I disconnect usually when I am not going to use the trailer for more than a week so it does not drain. Another preliminary step is to disconnect the hitch lock, that I set up to avoid the travel trailer from being detached and stolen. Likewise, you have to elevate the trailer tongue or trailer nose to be able to position the trailer hitch ball right underneath the coupler.
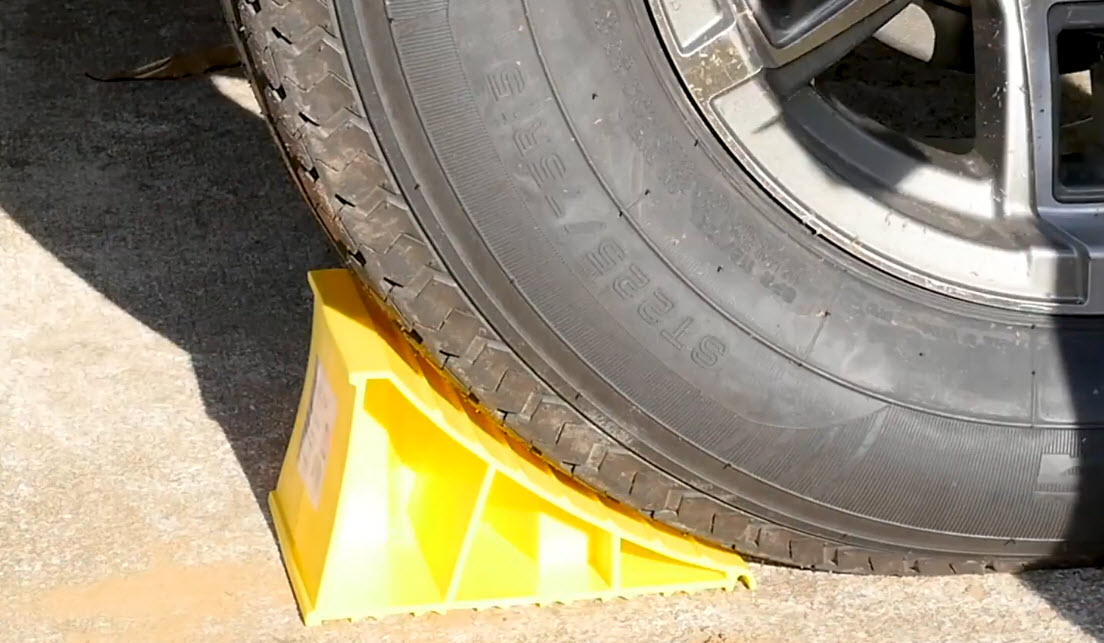
Place the wheel chocks to stabilize the travel trailer in a way that you fix it and will not move. This is a very important step to perform.
Now proceed to open the coupler latch and utilize the manual or automatic crank to lower the coupler onto the trailer hitch ball.
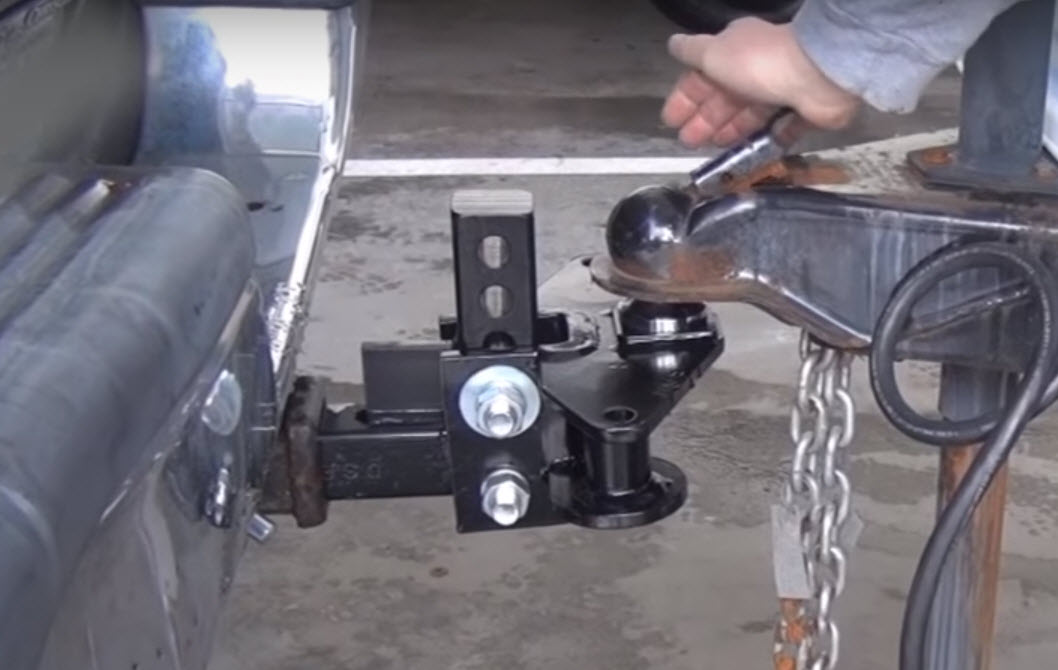
Proceed to the locking of the latch and the next step is the insertion of a hitch pin to prevent the unhitching of the trailer hitch ball afterward. this locking is performed to ensure that the ball is not going to come off of the trailer.
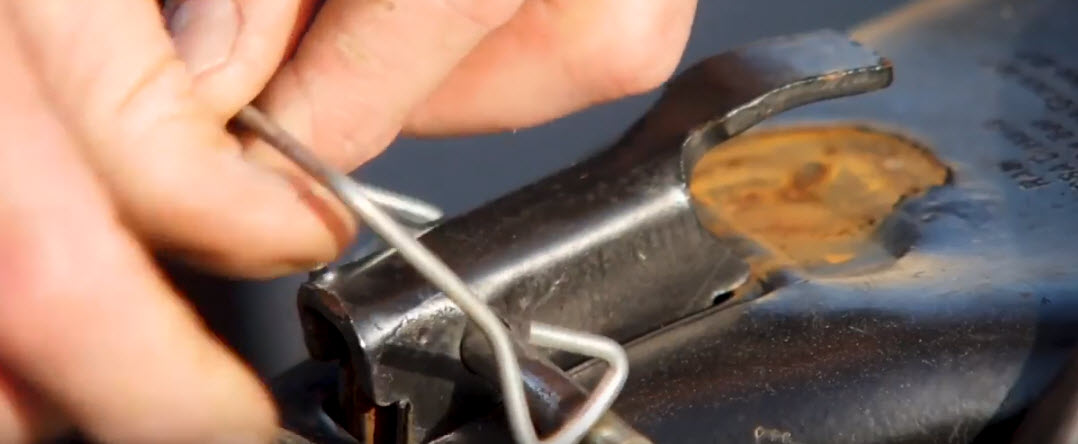
Now after pinning, we will raise the trailer tongue again, as we will continue with the attachments, specifically, the spring bars and other devices to be plugged.
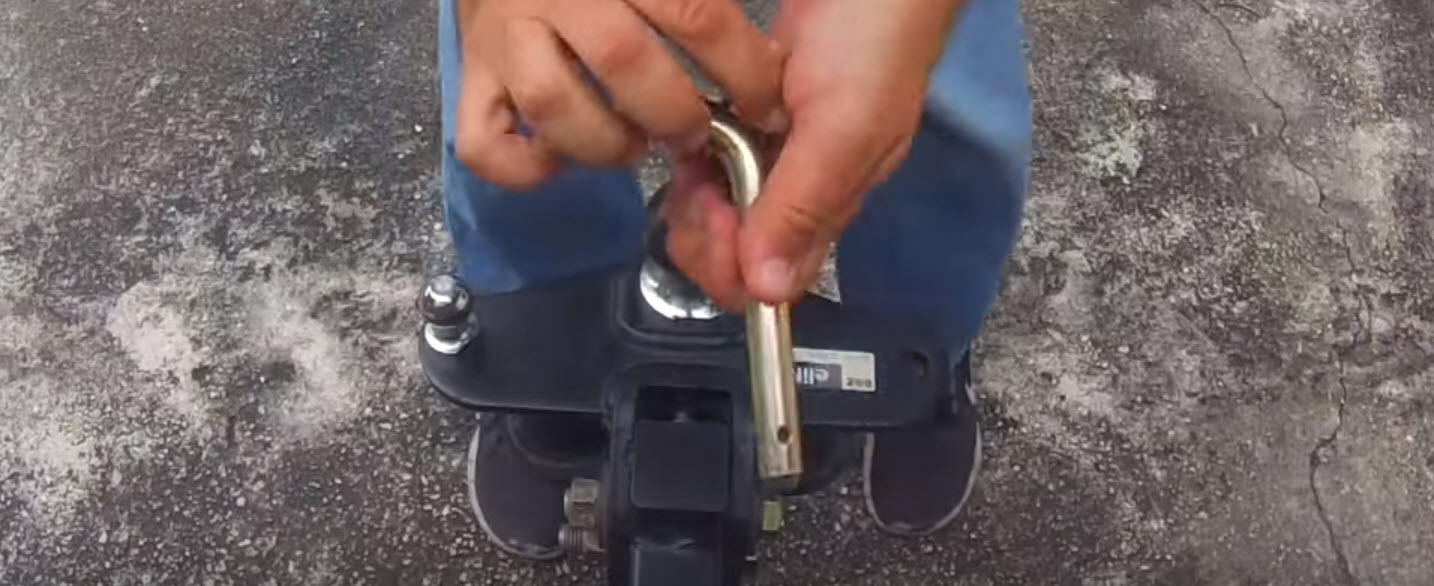
The next step is to attach the trailer hitch pin. Insert the hitch pin from left to right, so it has to be inserted on the left side of the hitch pin receiver tube. This is because the highest place on the highway is the left part. Highways are designed and constructed this way to allow drainage towards the ditches after the rain.
The normal vibrations during the road circulation of the towing vehicle and the travel trailer will drive the trailer hitch pin further inside the receiver, the hitch pin receiver instead of falling out to the road.
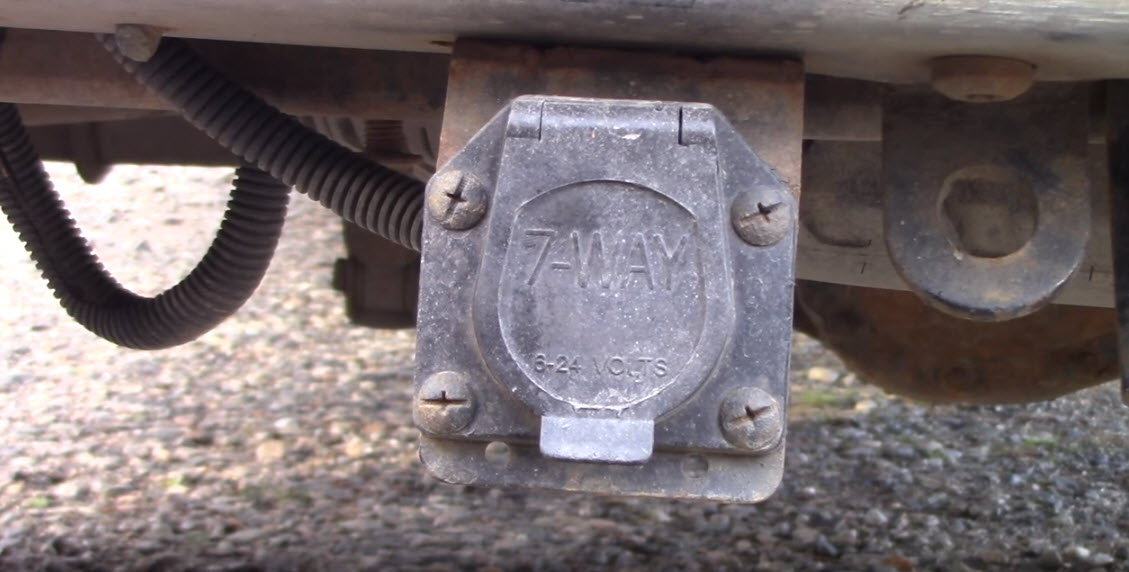
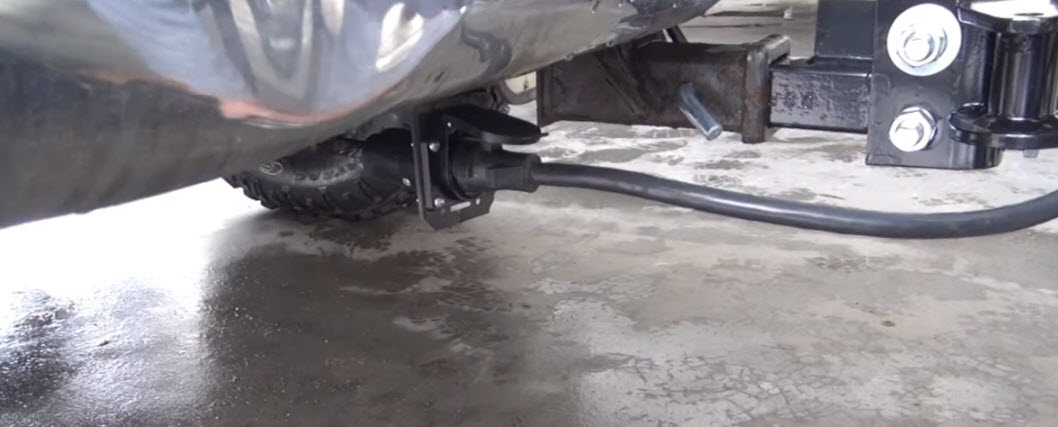
Now, we will hook up our electrical plug. This is a seven-pin connector, so you have light in the travel trailer and your travel trailer brakes will work properly after this connection. This cable should not be dragging in the ground.
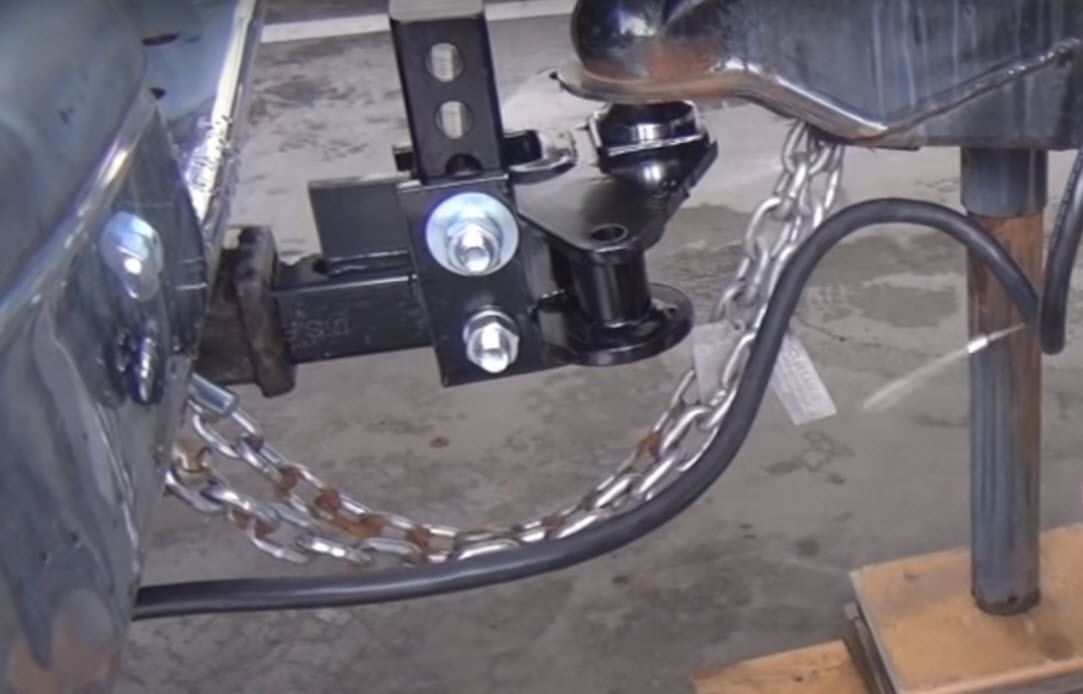
The next step is to connect our safety chains to the towing vehicle. There is one on each side, but they have to be crossed, and not like in the picture belowThe chains should not be too long so they do not drag on the road during traveling Safety chains crossed is a requirement to avoid the travel trailer from not being allowed to make sharp turns.
Crossed chains allow the truck and trailer to articulate on a very sharp turn, before one chain becomes fully extended, thus not allowing the trailer to follow behind smoothly on that sharp turn.
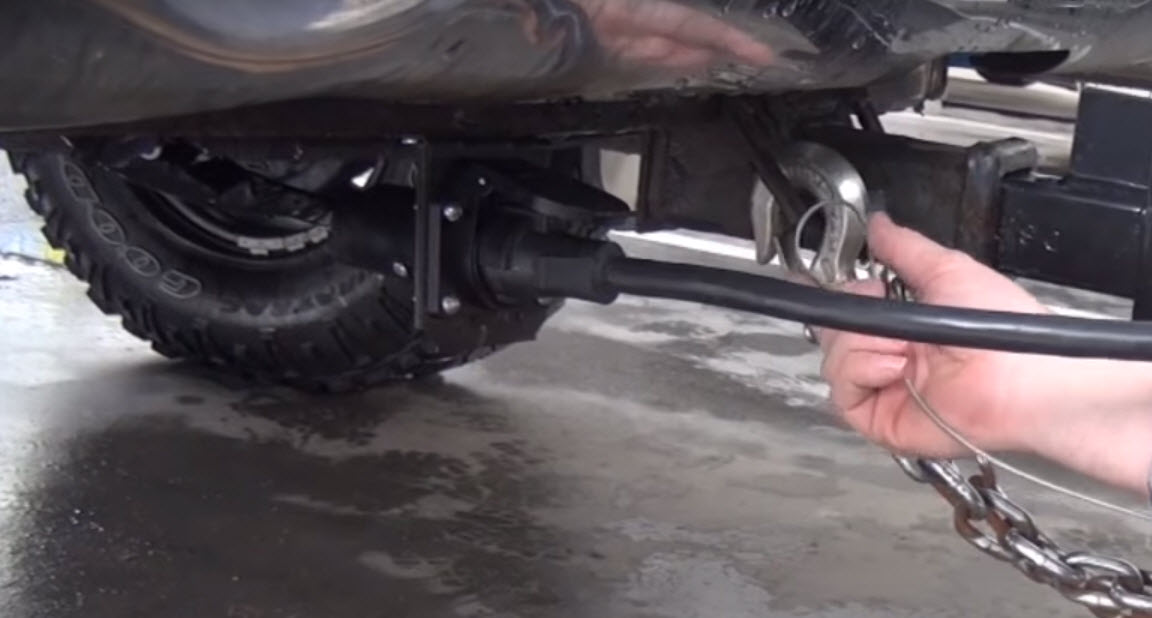
The next step is to install the breakaway cable. This installation is for the breakaway switch in case of an emergency. In the case that the travel trailer is detached and becomes loose, we need to be able to activate the brakes.
The detachment of this breakaway cable activates automatically the brakes of the travel trailer. Therefore as we explained, this breakaway cable that is on the travel trailer is designed to engage the braking system in case the travel trailer would come loose from the towing vehicle. This breakaway cable has to be preferably attached to the frame, or to any permanent part of the towing vehicle, in order that in the case that the entire receiver falls, the breakaway cable will still fulfill its functions.
You should not at all perform the attachment of the breakaway cable wrapped around the trailer hitch ball, as some people recommend. It exists a possibility, that the whole ball hitch assembly detaches outside the trailer hitch, very rare possibility, anyway.
Therefore, it is advisable to loop this breakaway cable through the receiver safety loop. After this attachment, the safety chain clips can be utilized to strengthen it with security. As aforementioned, some people recommend wrap this breakaway cable it around the ball of the trailer hitch and they claim that it is the only really safe place to secure it, but not necessarily the approach I will recommend.
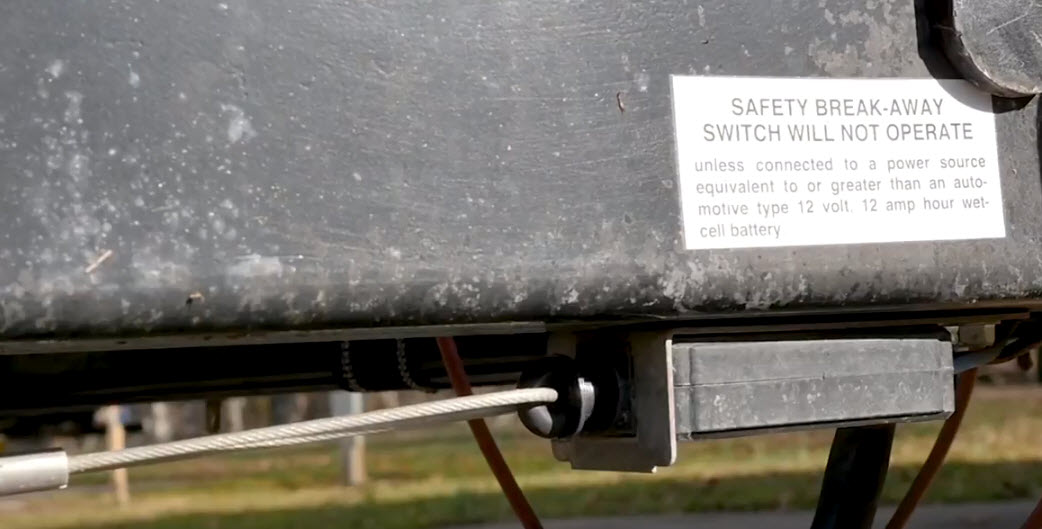
If the travel trailer detaches from the towing vehicle, the emergency braking system will be activated to stop the travel trailer and avoid accidents. A battery is required to be connected to allow the braking system to perform accordingly.
Unless you are towing a pop up camper, or a small RV, you will require an equalizer or weight distribution system. In my article about trailer sway control, I recommend to have a weight distribution system in all cases, and I recommend a trailer hitch of the brand Hensley, despite the price. You can read that article for our concepts about improving sway management and about installing a proper weight distribution system.
Now we will set up the spring bars for the weight distribution system. The purpose of the weight distribution system is so the weight of the RV is distributed evenly among the four wheels of the car gaining more stability. Again, in the article about sway management, I explained this feature thoroughly.
So, as I wrote above, the next part is to install the equalizer, or spring bars, or weight distribution system. There are many different types of equalizer bars, for the one that I am using now, I put it on sideways and there is a small D shaped latch. We insert it and ensure it is adequately caught as in the picture below.
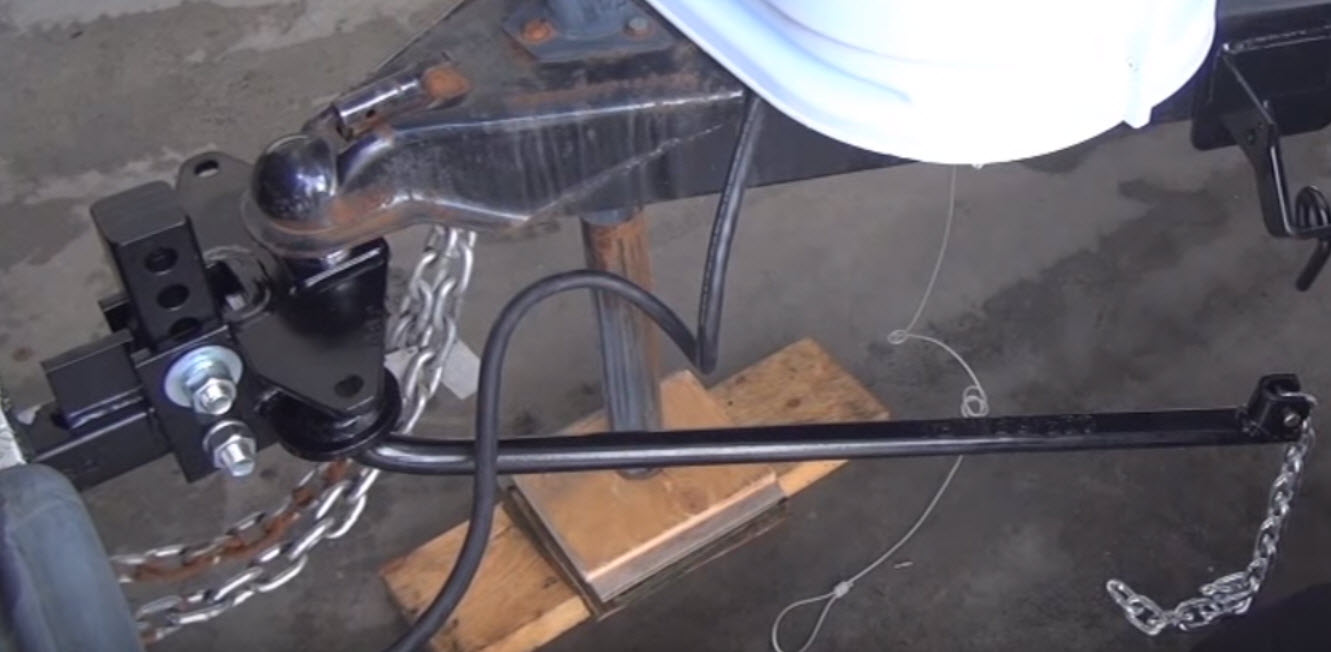
After this, our next step is to hitch up the chain so I will start off with a couple of links and see how tight we need to get it and we can adjust it after that in the trailer hitch. I know that mine is, for example, three links of the chain, but once you do it a couple of times in your own RV, you will have your own numbers and know which links of the chain are more suitable and how to position them in your own trailer hitch.
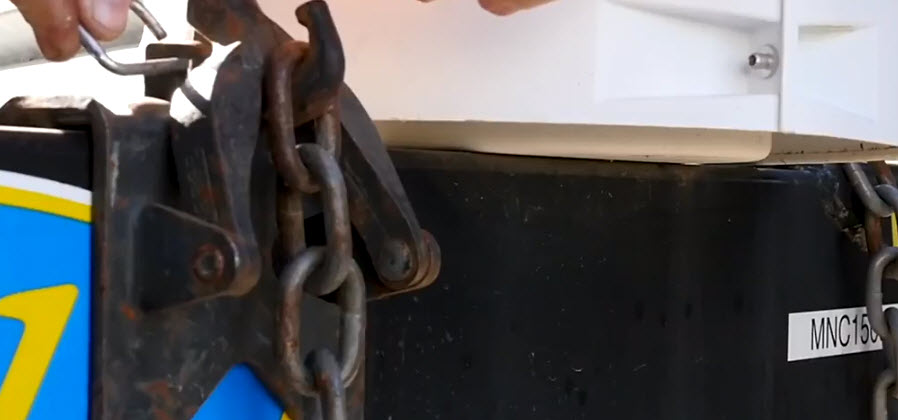
We have to take a look at the spring bar installed and it should be parallel with the frame. In my case, I recognize it is not parallel. It is a little bit higher. This means that we will have too much tension on it. See the picture below and notice that the bar is not completely parallel with the frame.
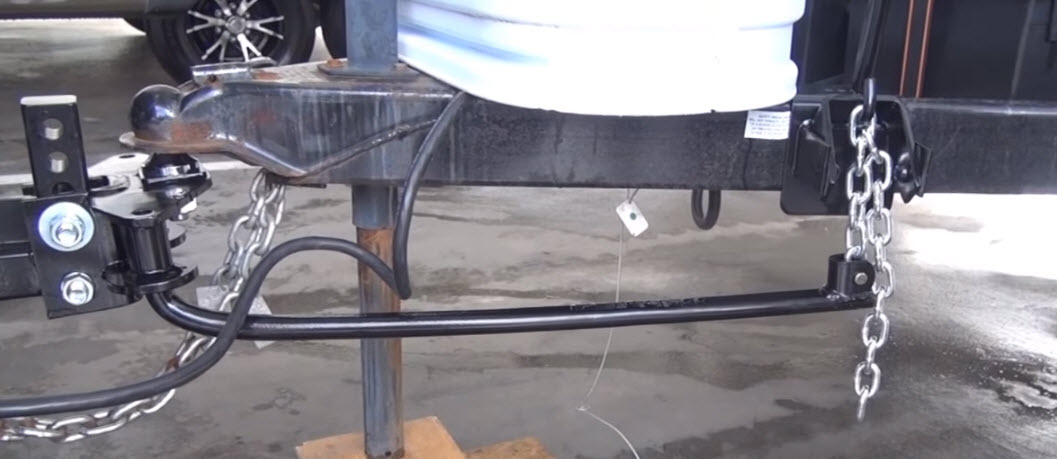
I will carefully undo the tension and then I am going to add enough extra couple links. The first time you will have to repeat this process until the spring bar of the weight distribution system is fully aligned with the frame. Be patient, because the next time you do this, you will already recognize which is the link of the chain that you have to use.
If you see now the picture below, you will notice that the spring bar is now roughly parallel with the frame of the travel trailer.

It is time now to secure the spring bars of the weight distribution system to the frame of the travel trailer through the saddle or bucket thanks to a tiny locking pin. So we have, on each side of the trailer, a spring bar, that is attached to the frame of the travel trailer through the saddle and linked by a chain.
Therefore, we have now a locking pin to keep this spring bar attached, as in the picture below. These pins are very easy to lose, so keep them in a place you remember. I keep them inside a wooden cabinet of the RV.
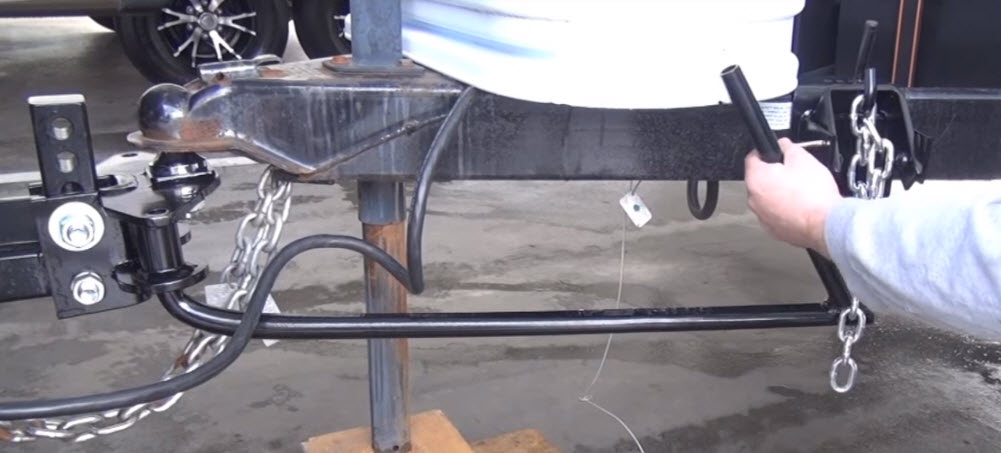
Here see the saddle closed, the chain attaching the saddle with the spring bar and now, just about to be secured with the locking pin.

Additionally, one more thing, last but not least, according to the size of your travel trailer, because it is not the same a small teardrop camper than a large fifth wheel, you may install on each side of the frame, a sway control bar. The purpose of this item is that your travel trailer will not sway if you happen to be circulating in the road too fast if you are facing windy conditions.
The sway control bar will minimize the sway effect caused by passing high profile vehicles or wind streams. It avoids the effects of being caught inside a push and pull air vortex. Its attachment is done through a socket and connectors for springs. If your travel trailer has twenty-five feet or more, you will require to sway controls. Pop up campers, may not need a sway control as they travel folded, and they have a small profile.
Again, I recommend you to read my article about trailer sway control to have more information. The safest recommendation for you and your family is to have always a weight distribution system in place attached to your trailer hitch.
Once you have completed the hookup and installed successfully the weight distribution system on both sides of the frame, then you can lower the jack down the rest of the way.
Practice visual scrutiny before towing and check that all the cords are set up adequately, and that the breakaway cable is properly installed, that the battery is connected in the travel trailer, that the braking system is working, and that the cables are not dragging or touching the ground at all.
Basic Distinction of Trailer Hitches
There are some differences that you need to be aware of if you are shopping for a trailer hitch for your RV. First, I understand that I have to make a short introduction about the different weights in the RV weighing system, and the way trailer hitches are rated.
There are different ways to list and classify weights and carrying capacities for hitches. Now, regards to what the trailer hitch can carry you want to make sure that also your vehicle can carry, and vice versa.
Thus, you do not want to install a trailer hitch on that is too small for the vehicle in case somebody down the road, for example, a customer if you install him a trailer hitch, does not read the instructions or anything about the hitch or maybe the stickers are all gone off after time from the hitch and they try to hook up something that the truck can actually haul according to its towing capacity, but the trailer hitch cannot because it is small.
That was my case, it happened to me. I am glad that I got underneath there and looked like it was not installed correctly and the trailer hitch was a little bit too light for the towing vehicle, in this case, a truck. As a consequence, if I would have gone out and bought a big eight thousand pound trailer that trailer hitch would have not been rated for it and it might have been disastrous.
Furthermore, the weights and the way that they are rated on these hitches you have a couple of different aspects to consider: you have what they call a tongue weight and that is the amount that can be pushed down on the ball and then you have your tow weight or your pull weight and that is basically the amount that can be pulled by the shank, the hitch ball and of course the trailer hitch. We have an article about tongue weight calculation, that I recommend you to read.
Each one of those weights can be broken down into two categories: one is the “carrying weight” which is what the hitch can carry without any help, the other weight is called a “weight distribution weight” now the first one that I just referred to the carrying weight they just listed as WC weight carrying and then the second rating the one with a weight distribution setup they call that a WD. Hence, it is either a WC or a WD.
Now the weight distribution can always increase your load on your towing vehicle and the trailer hitch because it distributes this weight over the two vehicles: the towing vehicle that is pulling in the camper or the trailer that is following and being towed. If you want to know more about the analysis of towing capacity, and how to calculate yours, we have an article for it. Likewise, we explain thoroughly how weight distribution hitches work as well.
We are available in the following areas:
- Ocala
- Gainesville
- Silver Springs Shores
- Marion Oaks
- Summerfield
- Fellowship
- Emathia
- Anthony
- Sparr
- Reddick
- Fort McCoy
- Citra
- Orange Lake
- Micanopy
- The Villages
- Orange Springs
- Williston
- Morriston
- Belleview
- Donnellon
- Crystal River
- Cedar Key
CALL ANYTIME FOR A FREE QUOTE
352-572-1090
Robby Billings
If you would like to ask questions, set up an appointment, or would like to leave feedback please send us an email now.


![bigstock-Vector-set-of---guarantee-g-15641318 [Converted] RB Hitch Installations Marion Oaks](https://rbhitchofocala.com/wp-content/uploads/2020/08/bigstock-Vector-set-of-guarantee-g-15641318-Converted.png)
