5TH WHEELER HITCH INSTALLATIONS
Call now for a quote or consultation
352-572-1090
SERVICES
-
16,000 Lb Installations Through 30,000 Lb Installations
-
5th Wheel Legs and Sliders
-
Custom Underbed 5th Wheel Brackets
-
Industry Standard Base Rails
-
5th Wheel Extension Harnesses
-
5th Wheel Sliders
-
5th Wheel Accessories
CALL ANYTIME FOR A FREE QUOTE
352-572-1090
Robby Billings
If you would like to ask questions, set up an appointment, or would like to leave feedback please send us an email now.
BUNOS BELOW
5th Wheel Hitch Installation How-To
How do you install a 5th wheel hitch? Installing a 5th wheel hitch involves removing the spare tire, measuring where bolt holes need to be drilled, drilling into the truck bed, assembling the 5th wheel hitch, measuring the trailer height, installing bolts and torqueing hardware.
In the following guide, we will go step-by-step through the process of 5th wheel hitch installation. Remember to follow the specific instructions for assembly when mounting your own 5th wheel hitch.
2. Position the front base rail
3. Mark the first drill location and drill a pilot hole
4. Check the pilot hole under the truck bed and drill the remaining holes
5. Enlarge the bolt holes
6. Bolt in the under-bed brackets
7. Bolt down the front 5th wheel rail
8. Measure the 5th wheel hitch height
9. Attach the 5th wheel legs
10. Position the rear 5th wheel rail
11. Drill holes for the rear base rail
12. Bolt down the rear base rail
13. Install any remaining bolts
14. Torque all hardware
15. Secure the 5th wheel hitch
Your content goes here. Edit or remove this text inline or in the module Content settings. You can also style every aspect of this content in the module Design settings and even apply custom CSS to this text in the module Advanced settings.
How to Install a 5th Wheel Hitch
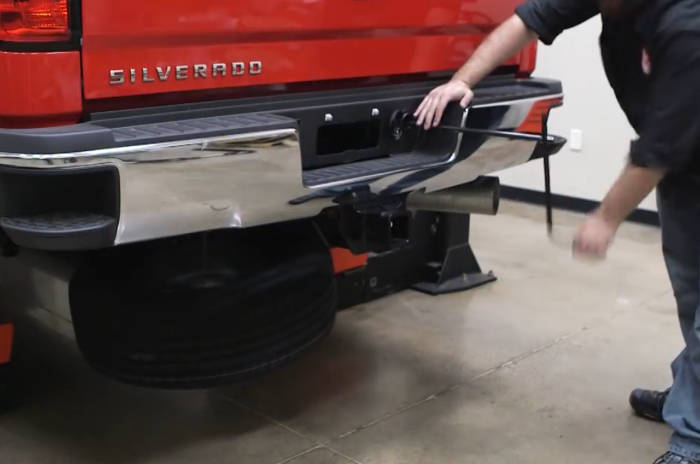
Step 1: Remove the spare tire
Installing a 5th wheel with brackets and base rails requires access to the underbelly of your truck bed. Remove the spare tire to give yourself more space.
You may also need to remove a heat shield or other components throughout the process. Be sure to follow the instructions accompanying your specific hitch.
Step 2: Position the front base rail
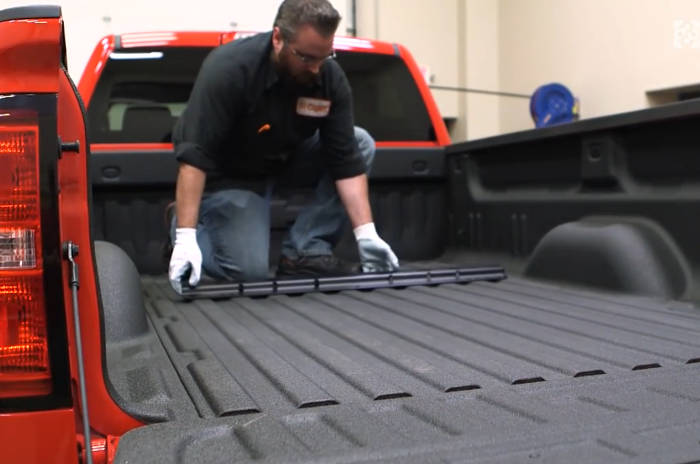
Place the base rail that will be closest to the truck cab into position, measuring the correct distance from the front of the truck bed. This distance can vary between long-bed and short-bed pickup trucks. Refer to the instructions for exact measurements.
You will also need to center the base rail between the wheel wells.
Step 3: Mark the first drill locations
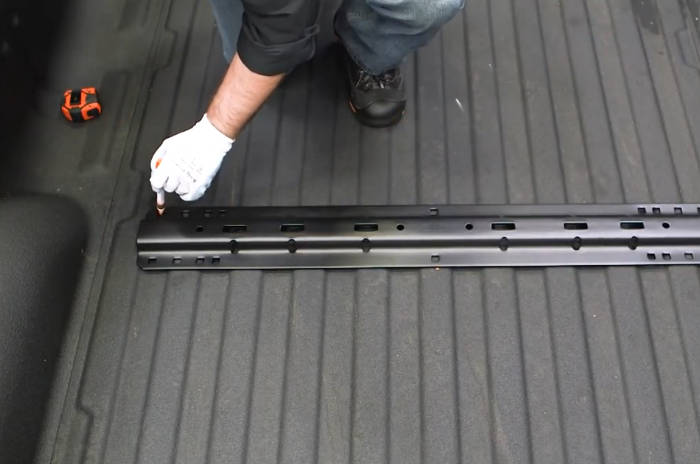
With the base rail correctly positioned, mark the bolt hole locations for the rail, using a paint pen.
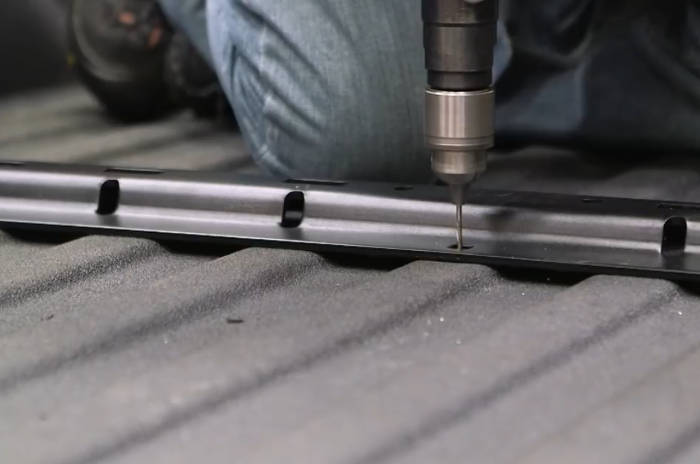
Then, use a center punch to mark just one of the drill locations. The other bolt locations will be marked in a later step. The center-punch will pinpoint exactly where to drill and will help keep the drill bit from wandering. Finally, drill a pilot hole down through the marked location.
Step 4: Check the pilot hole under the bed
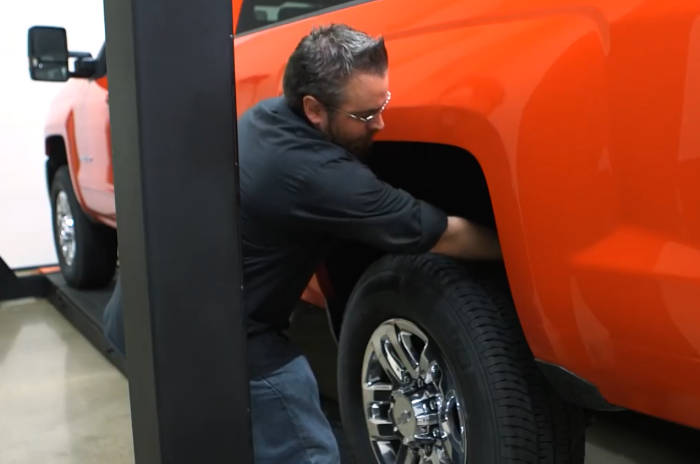
Temporarily position the appropriate under-bed 5th wheel bracket, corresponding to the pilot hole location you just drilled.
If the bracket lines up correctly with the hole, the remaining bolt holes can be drilled. Mark them with a paint pen, move the base rail out of the way, center-punch the drill locations and drill down from above the truck bed.
Step 5: Enlarge the bolt holes
Using a step bit, drill out the pilot holes until they are large enough to accept the bolts of the 5th wheel rails. Go slowly and drill carefully.
With the bolts holes drilled to the proper size, we recommend using some touch-up paint to protect any exposed metal edges. This will help prevent corrosion. Deburr the drilled holes, and then apply the paint.
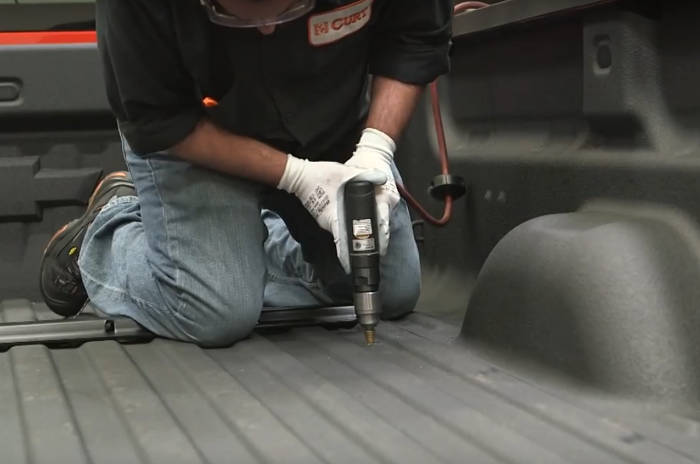
Step 6: Bolt in the under-bed brackets
Position the under-bed brackets on either side of the truck bed. These are typically installed from the wheel well opening.
Place the appropriate bracket or brackets into position and fasten them to the frame of the truck with the included nuts and bolts. Then, fasten the other bracket on the opposite side of the truck.
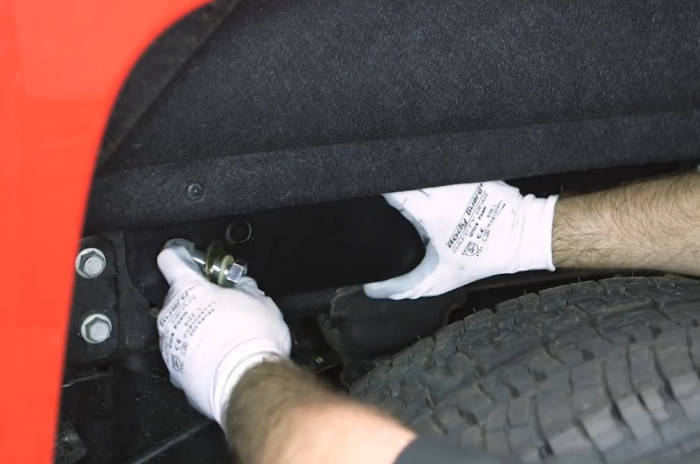
Step 7: Bolt down the 5th wheel rail
Reposition the base rail again in the truck bed over the appropriate bolt hole locations. If the truck has bed rails in the bottom of the truck bed, spacers may be included. These need to be positioned under the 5th wheel rails, between the truck bed rails, to ensure consistent metal-to-metal contact.
With the rails in position, insert the bolts down through the holes and secure them with nuts applied underneath the truck bed.
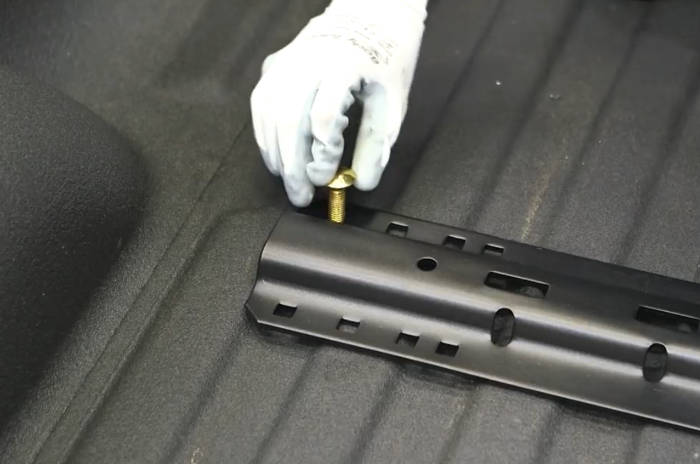
Step 8: Measure the 5th wheel hitch height
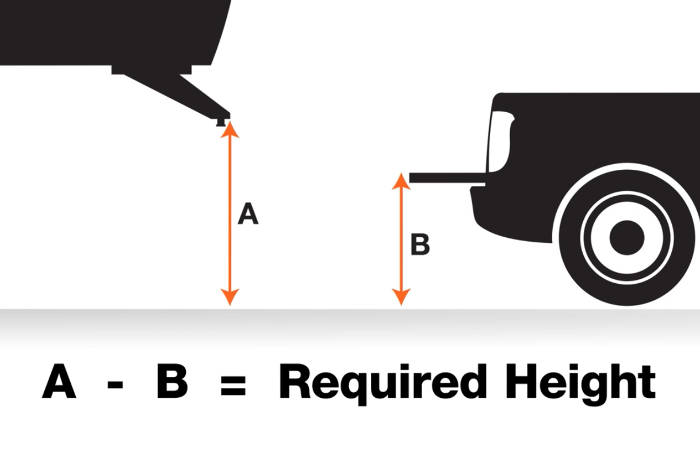
Your 5th wheel hitch will need to be installed at the correct height to accommodate your truck bed. There must be a minimum height difference of 5-1/2″ between your truck bed walls and the trailer.
To find the hitch height, make sure your trailer is parked on a level surface. Then, measure from the ground to the underside of the kingpin plate (A). Next, measure from the ground to the top of the open tailgate of your truck (B).
A minus B equals C, the required height for your 5th wheel hitch.
Step 9: Attach the 5th wheel legs
With the hitch height measured, find the correct mounting holes on your 5th wheel hitch head to accommodate the necessary height. Most 5th wheel hitches offer a range of vertical adjustment. Position the legs onto the head and secure them in place, using the included bolts.
For some 5th wheels, you may need to remove the head plate to access the leg bolt holes. It may also be helpful to turn the head upside-down to install the legs.
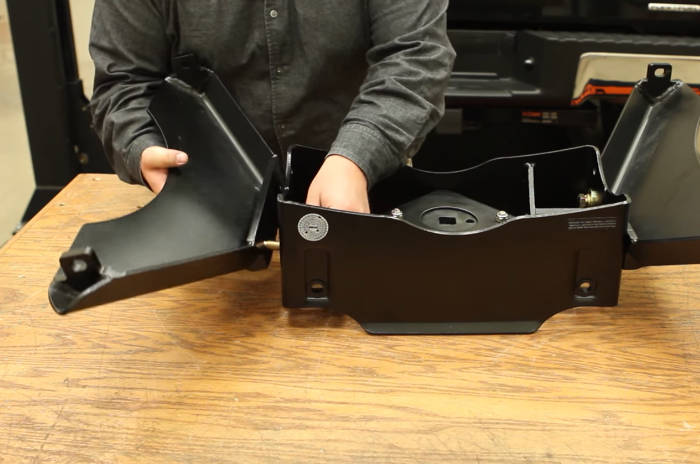
Step 10: Position the rear 5th wheel rail
Your 5th wheel hitch will need to be installed at the correct height to accommodate your truck bed. There must be a minimum height difference of 5-1/2″ between your truck bed walls and the trailer.
To find the hitch height, make sure your trailer is parked on a level surface. Then, measure from the ground to the underside of the kingpin plate (A). Next, measure from the ground to the top of the open tailgate of your truck (B).
A minus B equals C, the required height for your 5th wheel hitch.
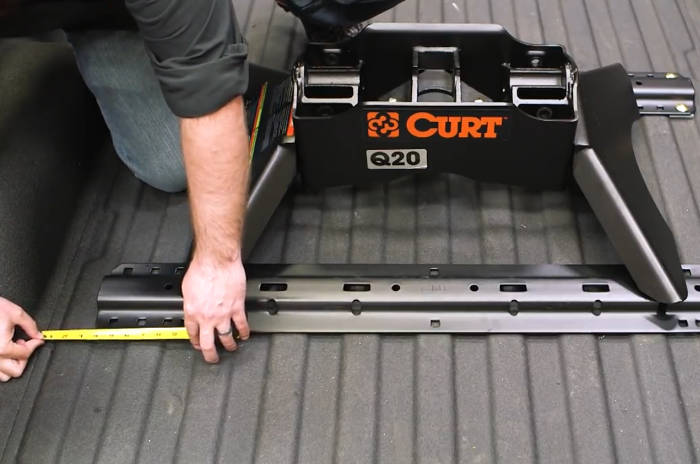
Step 11: Drill holes for the rear base rail
Before marking the drill locations for the second base rail, make sure that the rail is centered in the truck bed, between the wheel wells. Then, mark the drill points with a paint pen, move the rail out of the way (and hitch assembly if necessary), center-punch, and drill pilot holes.
Next, use a step bit to enlarge the holes to the correct diameter for the base rail bolts. Finish off the bolt holes with touch-up paint to help prevent rust.
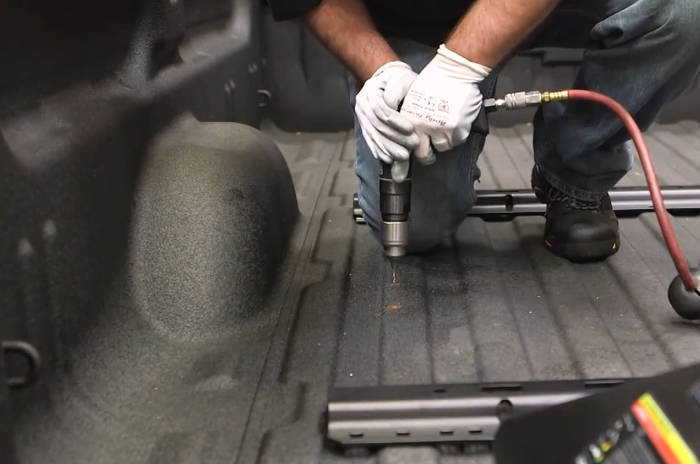
Step 12: Bolt down the rear base rail
Reposition the second 5th wheel rail and insert the included bolts down through the holes you just drilled in the truck bed. The bolts will pass through the rail, the truck bed, and the under-bed brackets already installed.
As with the first base rail, the nuts to fasten the bolts will need to be installed from underneath the truck bed. Be sure to install any spacers or additional hardware specified in the instructions.
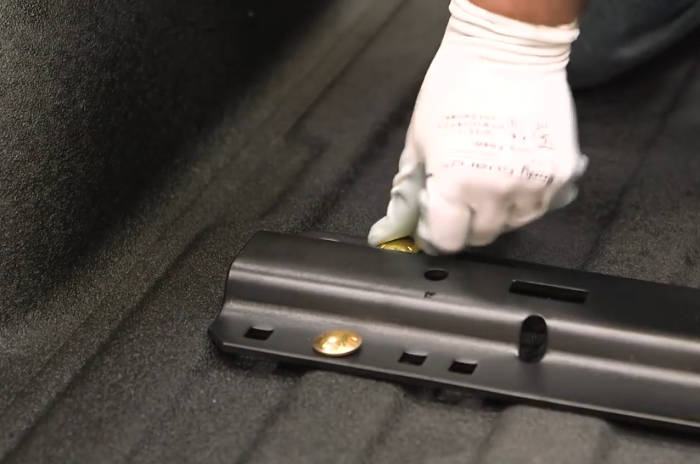
Step 13: Install any remaining bolts
Some 5th wheel installations require supplemental bolts to be installed in both rails, providing enhanced security and strength. Marking the drill locations is not necessary. Simply center-punch, using the rail as a guide. Then, drill pilot holes and enlarge the holes with a step bit.
Finally, insert the necessary bolts and fasten them with nuts underneath the truck bed.
Step 14: Torque all hardware
With the base rails completely installed with all necessary hardware, it is time to fully tighten the bolts. This requires a torque wrench. Torque values vary by bolt size and will be specified in the installation instructions included with your hitch.
5th wheel hardware may require torque greater than a typical 100-foot-pound torque wrench can provide. Instead of purchasing a new torque wrench, call your local automotive store and ask it they rent out tools and equipment.

Step 15: Reinstall the 5th wheel hitch
Lift the 5th wheel hitch assembly back into place, dropping it into the fully installed base rails. If you haven’t torqued the hardware on the hitch yet, do so at this time. Also, make sure that all necessary pins and other components are installed before hitching up to tow.
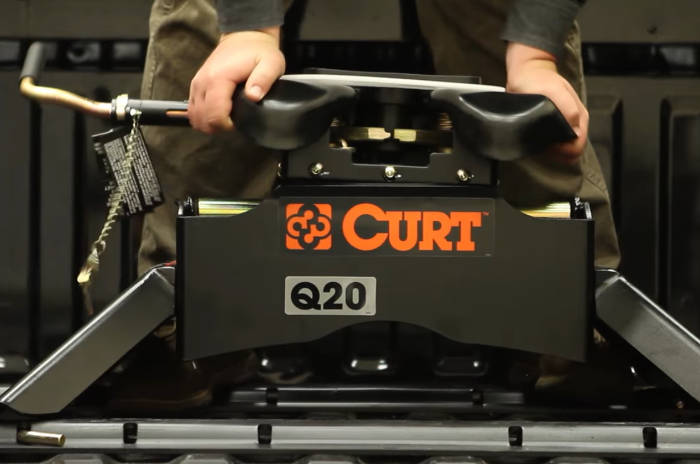
Yes this service comes to you to do the installation, so allows you to keep your busy schedule while we do the work at your location.
Towing Tip!
If your tow hitch installation requires you to feed bolts in through a hollow frame and you accidentally lose a bolt inside, getting it out can be extremely tedious. However, it CAN be done. Insert a telescoping magnet in through the hole, and lure the bolt to the hole until you can pull it out.
We are available in the following areas:
- Ocala
- Gainesville
- Silver Springs Shores
- Marion Oaks
- Summerfield
- Fellowship
- Emathia
- The Villages
- Anthony
- Sparr
- Reddick
- Fort McCoy
- Citra
- Orange Lake
- Micanopy
- Orange Springs
- Williston
- Morriston
- Belleview
- Donnellon
- Crystal River
- Cedar Key


![bigstock-Vector-set-of---guarantee-g-15641318 [Converted] RB Hitch Installations Marion Oaks](https://rbhitchofocala.com/wp-content/uploads/2020/08/bigstock-Vector-set-of-guarantee-g-15641318-Converted.png)
